摘要:本文将使用ModelBox端云协同AI开发套件(RK3568)实现摄像头虚拟背景AI应用的开发。
本文分享自华为云社区《ModelBox开发案例 - RK3568实现摄像头虚拟背景【玩转华为云】》,作者:AI练习生 。
本文将使用ModelBox端云协同AI开发套件(RK3568)实现摄像头虚拟背景AI应用的开发。

最终运行效果如下:
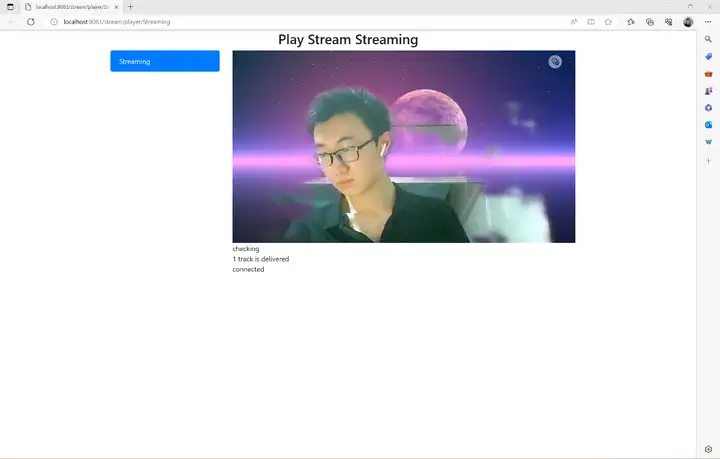
本应用采用RK开发套件完成,需要具备RK3568开发板。本硬件可以通过以下链接购买:https://marketplace.huaweicloud.com/contents/2b73a21b-91c5-4c58-a61a-5a5460afeaf7 ,规格包含:RK3568开发板×1、A2 WiFi模块×1、外壳×1、电源线和电源插头×1、散热片×1。


onnx结构:


rknn结构:

我们准备了(1080p, 30fps)的视频,使用原生的onnxruntime进行推理,帧率最高是7:
实现代码:
"""
OpenCV 读取摄像头视频视频流,使用原生的onnxruntime推理
"""
# 导入OpenCV
import cv2
import time
import drawUtils
import numpy as np
import onnxruntime
# cap = cv2.VideoCapture(0)
cap = cv2.VideoCapture('test.mp4')

if not cap.isOpened():
 print('文件不存在或编码错误')
else:
 i = 0
 fps = 30
 start_time = time.time()
 font = cv2.FONT_HERSHEY_PLAIN
 image_background = cv2.imread('R-C.jpg')
 width = int(cap.get(cv2.CAP_PROP_FRAME_WIDTH))
 height = int(cap.get(cv2.CAP_PROP_FRAME_HEIGHT))
 onnx_model = onnxruntime.InferenceSession('linknet.onnx')
 image_background = cv2.resize(image_background, (width, height))
 writer = cv2.VideoWriter('test_result.mp4',cv2.VideoWriter_fourcc(*'X264'),fps,(width,height))
 image_background = image_background/255.

while cap.isOpened():
 ret,frame = cap.read()
 if ret:
 img = cv2.resize(frame, (256, 256))
 img = img[...,::-1]/255.
 img = img.astype(np.float32)
 img = np.transpose(img, (2, 0, 1))
 data = np.expand_dims(img, axis=0)
 onnx_input ={onnx_model.get_inputs()[0].name: data}
 pred_mask = onnx_model.run(None, onnx_input)
 pred_mask = np.array(pred_mask)
 pred_mask = pred_mask[0][0][0]
 pred_mask = cv2.resize(pred_mask, (width, height))
 pred_mask = pred_mask.reshape((height, width, 1))
 img_multi = pred_mask*frame/255.
 mask_layer = np.ones((height, width)).reshape(height, width, 1)-pred_mask
 mask_layer = image_background*mask_layer
 image_add = img_multi+mask_layer
 image_add = image_add*255
 image_add = image_add.astype(np.uint8)
 # 计算FPS
 i += 1
 now = time.time()
 fps_text = int(1 / ( now - start_time))
 start_time = now
 print('linknet post ' + str(i))
 # 添加中文(首先导入模块)
 img_add = drawUtils.cv2AddChineseText(image_add, '帧率:'+str(fps_text), (20,50), textColor=(0, 255, 0), textSize=30)
 # 显示画面
 # cv2.imshow('demo',img_add)
 writer.write(img_add)
 # 退出条件
 if cv2.waitKey(1) & 0xFF == ord('q'):
 break
 else:
 break

cap.release()
cv2.destroyAllWindows()复制
修改使用编为0摄像头(默认为PC自带的摄像头)进行实时检测:
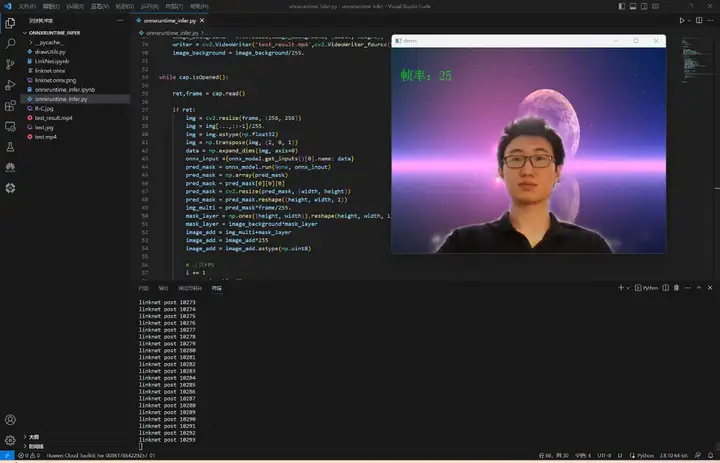
本案例所需资源(代码、模型、测试数据等)均可从网盘链接下载。
将virtual_background文件夹拖到工程目录workspace目录下面,开启性能统计:
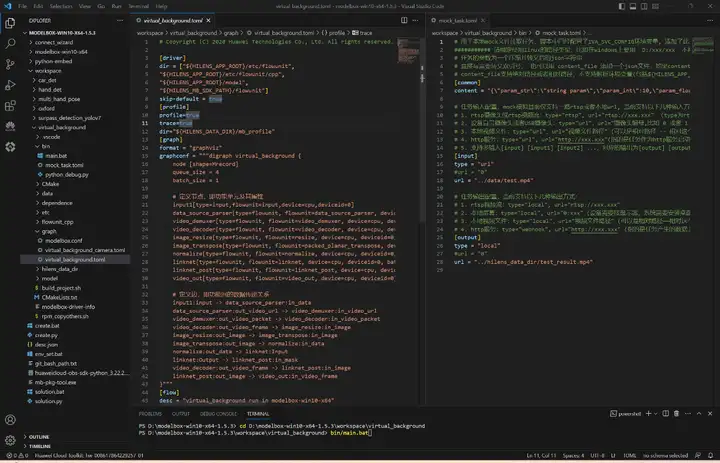
切换到工程目录,执行bin/main.bat运行应用,生成的视频和性能统计文件都在hilens_data_dir文件夹下面:
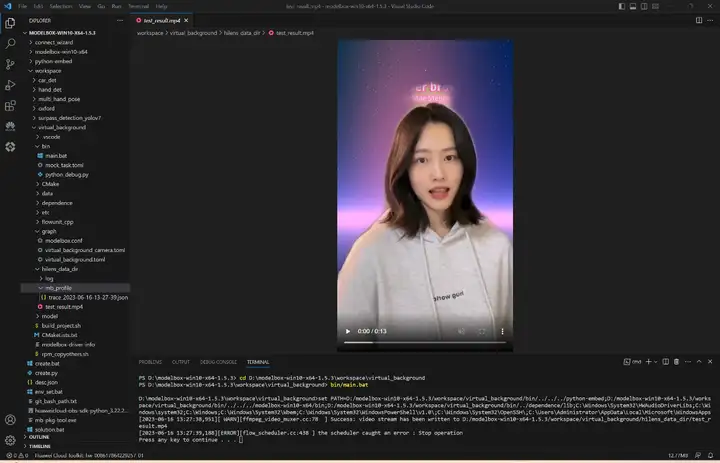
在Chrome浏览器chrome://tracing中加载性能统计文件:
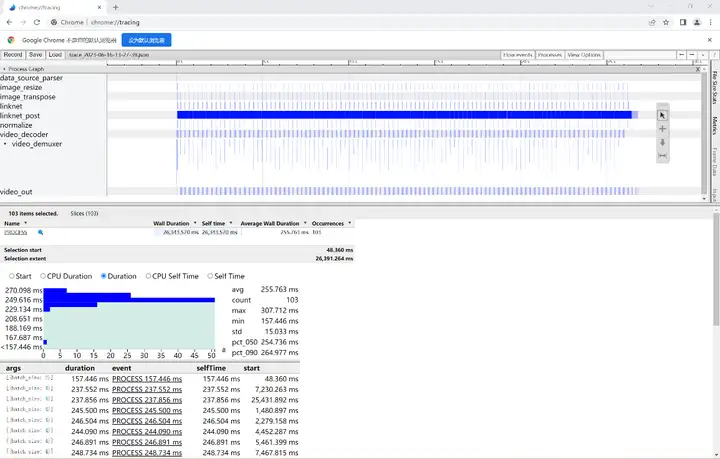
该AI应用输入1080p的视频,batch_size=4耗时约为256ms,平均每帧处理速度为64ms,fps=1000/64≈16,接下来我们给出该AI应用在ModelBox中的完整开发过程(以开发套件为例)。
打开工程目录bin/mock_task.toml文件,修改其中的任务输入和任务输出,配置为如下内容:
# 用于本地mock文件读取任务,脚本中已经配置了IVA_SVC_CONFIG环境变量, 添加了此文件路径
########### 请确定使用linux的路径类型,比如在windows上要用  D:/xxx/xxx  不能用D:\xxx\xxx  ###########
# 任务的参数为一个压缩并转义后的json字符串
# 直接写需要转义双引号, 也可以用 content_file 添加一个json文件,如果content和content_file都存在content会被覆盖
# content_file支持绝对路径或者相对路径,不支持解析环境变量(包括${HILENS_APP_ROOT}、${HILENS_DATA_DIR}等)
[common]
content = "{\"param_str\":\"string param\",\"param_int\":10,\"param_float\":10.5}"
# 任务输入配置,mock模拟目前仅支持一路rtsp或者本地url, 当前支持以下几种输入方式:
# 1. rtsp摄像头或rtsp视频流:type="rtsp", url="rtsp://xxx.xxx"  (type为rtsp的时候,支持视频中断自动重连)
# 2. 设备自带摄像头或者USB摄像头:type="url",url="摄像头编号,比如 0 或者 1 等" (需配合local_camera功能单元使用)
# 3. 本地视频文件:type="url",url="视频文件路径" (可以是相对路径 -- 相对这个mock_task.toml文件, 也支持从环境变量${HILENS_APP_ROOT}所在目录文件输入)
# 4. http服务:type="url", url="http://xxx.xxx"(指的是任务作为http服务启动,此处需填写对外暴露的http服务地址,需配合httpserver类的功能单元使用)
# 5. 支持多输入[input] [input1] [input2] ...,对应的输出为[output] [output1] [output2] ...,如果使用videoout功能单元输出,则输入和输出个数必须匹配,同时url不能重名
[input]
type = "url"
url = "0"
#url = "../data/test.mp4"
# 任务输出配置,当前支持以下几种输出方式:
# 1. rtsp视频流:type="local", url="rtsp://xxx.xxx"
# 2. 本地屏幕:type="local", url="0:xxx" (设备需要接显示器,系统需要安装桌面)
# 3. 本地视频文件:type="local",url="视频文件路径" (可以是相对路径——相对这个mock_task.toml文件, 也支持输出到环境变量${HILENS_DATA_DIR}所在目录或子目录)
# 4. http服务:type="webhook", url="http://xxx.xxx" (指的是任务产生的数据上报给某个http服务,此处需填写上传的http服务地址)
[output]
type = "local"
url = "0"
#url = "../hilens_data_dir/test_result.mp4"复制
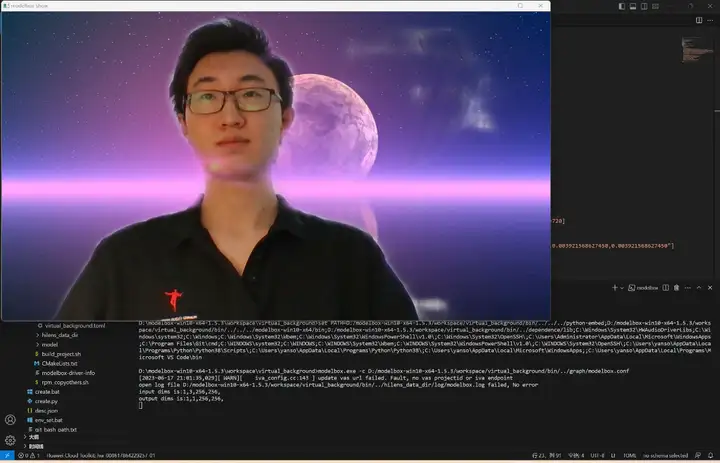
执行.\bin\main.bat camera运行应用,将会自动弹出实时的人像分割画面:
如果你对项目开发感兴趣,可以通过本章进一步了解。
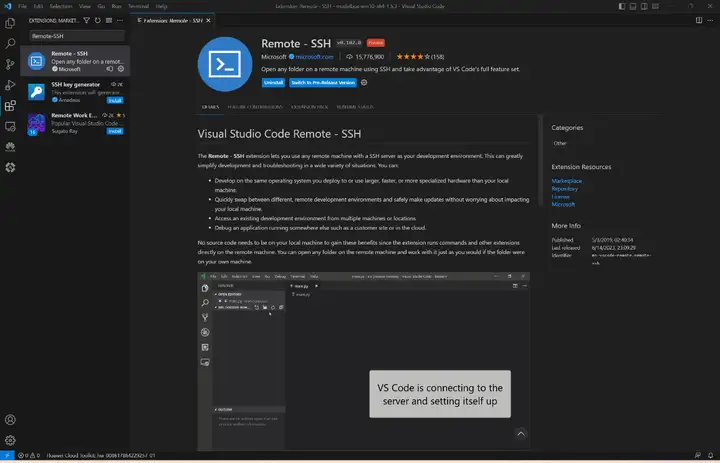
我们推荐在PC端使用VS Code远程连接开发板来对设备进行操作,安装Remote-SSH:
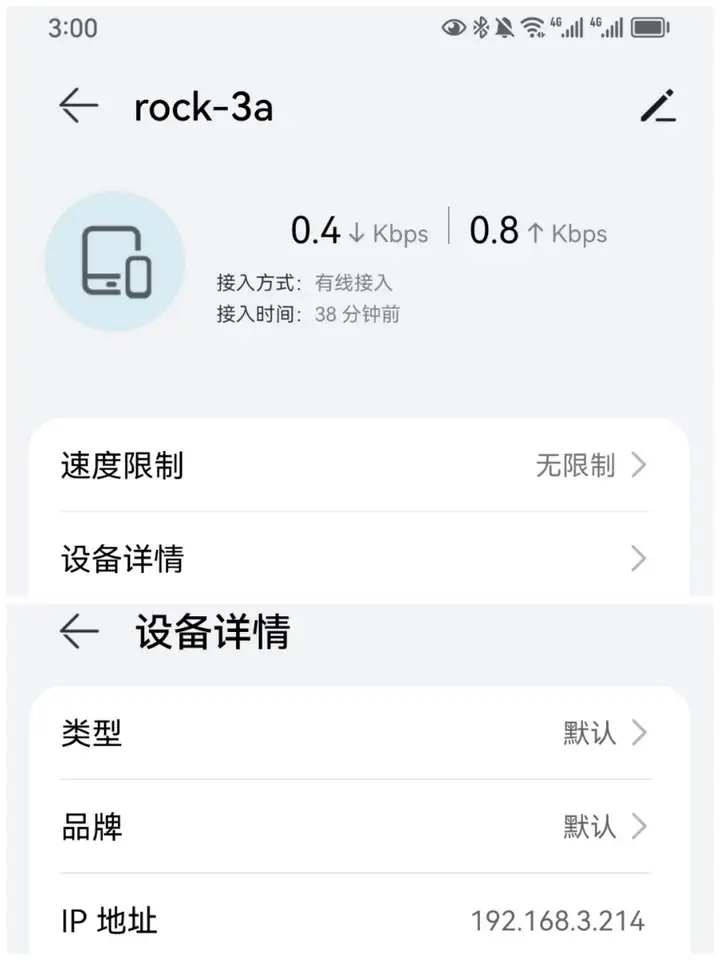
可以在APP应用智慧生活上查看设备的ip地址:
电脑和设备处于同一WiFi下,在VS Code中使用Remote-SSH远程登陆:
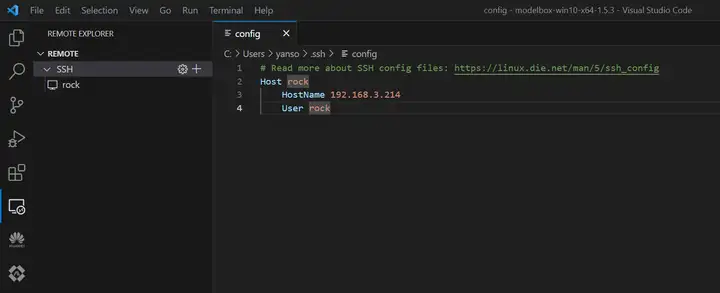
在SDK目录下使用create.py脚本创建工程,我决定工程取名为virtual_background:
rock@rock-3a:~$ cd /home/rock/modelbox
rock@rock-3a:~/modelbox$ ./create.py -t server -n virtual_background
sdk version is modelbox-rk-aarch64-1.5.3
success: create virtual_background in /home/rock/modelbox/workspace复制
rock@rock-3a:~/modelbox$ ./create.py -t infer -n linknet_infer -p virtual_background
sdk version is modelbox-rk-aarch64-1.5.3
success: create infer linknet_infer in /home/rock/modelbox/workspace/virtual_background/model/linknet_infer复制
可以看到推理功能单元创建在了项目工程的model目录下面:
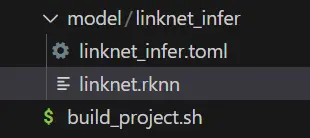
将我们转换好的模型linknet.rknn拖到linknet_infer目录下,接着编辑.toml配置文件,主要修改模型的路径与输入输出,由于我们模型有一个来自rknpu的uint8的类型输入和一个float类型的输出,所以对配置文件编辑如下:
# Copyright (C) 2020 Huawei Technologies Co., Ltd. All rights reserved.
[base]
name = "linknet_infer"
device = "rknpu"
version = "1.0.0"
description = "your description"
entry = "./linknet.rknn" # model file path, use relative path
type = "inference"
virtual_type = "rknpu2" # inference engine type: rockchip now support rknpu, rknpu2(if exist)
group_type = "Inference" # flowunit group attribution, do not change
is_input_contiguous = "false" # rk do not support memory combine, fix, do not change
# Input ports description
[input]
[input.input1]  # input port number, Format is input.input[N]
name = "Input" # input port name
type = "uint8" # input port data type ,e.g. float or uint8
device = "rknpu" # input buffer type: use rknpu for zero-copy, cpu also allow
# Output ports description
[output]
[output.output1] # output port number, Format is output.output[N]
name = "Output" # output port name
type = "float" # output port data type ,e.g. float or uint8复制
可以看到该模型有1个输入节点,1个输出节点。需要注意其中的virtual_type配置与npu类别有关,RK3568需配置为rknpu2;输入节点的device配置建议设为与该推理功能单元的上一个功能单元相同。
ModelBox内置了rknn推理引擎和推理逻辑,开发者只需要准备好模型文件、编辑好配置文件,即可使用该模型进行推理,无需编写推理代码。
另外,本案例使用的人像分割模型是由Pytorch框架训练得到,我们事先使用rknn-toolkit2工具将它转换为RK3568支持的模型格式,感兴趣的话可以在RK3568模型转换查看模型转换过程。
我们需要一个后处理功能单元来对模型推理结果进行解码,依然是万能的create.py脚本:
rock@rock-3a:~/modelbox$ ./create.py -t python -n linknet_post -p virtual_background
sdk version is modelbox-rk-aarch64-1.5.3
success: create python linknet_post in /home/rock/modelbox/workspace/virtual_background/etc/flowunit/linknet_post复制
可以看到在项目工程的etc/flowunit目录下面已经生成了该功能单元,存放.toml配置文件与.py功能代码文件:
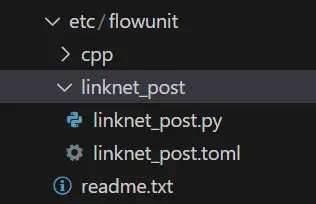
接下来补充该功能单元的逻辑代码,如果对此不感兴趣,可以将我们资源包中的代码CtrlC+V速通本节。
首先补充后处理功能单元的配置文件,对于后处理功能单元,我们需要知道模型推理的shape,因此需要对config字段进行配置。此外,我们还需要修改输入输出,接收一个float类型的推理结果与一个uint8类型的原图,输出融合后的新图:
# Copyright (c) Huawei Technologies Co., Ltd. 2022. All rights reserved.
# Basic config
[base]
name = "linknet_post" # The FlowUnit name
device = "cpu" # The flowunit runs on cpu
version = "1.0.0" # The version of the flowunit
type = "python" # Fixed value, do not change
description = "description" # The description of the flowunit
entry = "linknet_post@linknet_postFlowUnit" # Python flowunit entry function
group_type = "Generic" # flowunit group attribution, change as Input/Output/Image/Generic ...
# Flowunit Type
stream = false # Whether the flowunit is a stream flowunit
condition = false # Whether the flowunit is a condition flowunit
collapse = false # Whether the flowunit is a collapse flowunit
collapse_all = false # Whether the flowunit will collapse all the data
expand = false #  Whether the flowunit is a expand flowunit
# The default Flowunit config
[config]
mask_h = 256
mask_w = 256
# Input ports description
[input]
[input.input1] # Input port number, the format is input.input[N]
name = "in_mask" # Input port name
type = "float" # Input port type
[input.input2] # Input port number, the format is input.input[N]
name = "in_image" # Input port name
type = "uint8" # Input port type
# Output ports description
[output]
[output.output1] # Output port number, the format is output.output[N]
name = "out_image" # Output port name
type = "uint8" # Output port type复制
后处理代码:
# Copyright (c) Huawei Technologies Co., Ltd. 2022. All rights reserved.
#!/usr/bin/env python
# -*- coding: utf-8 -*-
import _flowunit as modelbox
import numpy as np
import cv2
class linknet_postFlowUnit(modelbox.FlowUnit):
 # Derived from modelbox.FlowUnit
 def __init__(self):
 super().__init__()
 self.image_background = cv2.imread('data/R-C.jpg')
 self.image_background = cv2.cvtColor(self.image_background,cv2.COLOR_BGR2RGB)
 self.image_background = self.image_background/255.
 def open(self, config):
 # Open the flowunit to obtain configuration information
 self.mask_h = config.get_int('mask_h', 256)
 self.mask_w = config.get_int('mask_w', 256)
 self.index = 0
 return modelbox.Status.StatusCode.STATUS_SUCCESS
 def process(self, data_context):
 # Process the data
 in_mask = data_context.input("in_mask")
 in_image = data_context.input("in_image")
 out_image = data_context.output("out_image")
 # linknet_post process code.
 # Remove the following code and add your own code here.
 for buffer_mask, buffer_image in zip(in_mask, in_image):
 # 获取输入Buffer的属性信息
 width = buffer_image.get('width')
 height = buffer_image.get('height')
 channel = buffer_image.get('channel')
 # 将输入Buffer转换为numpy对象
 image_background = cv2.resize(self.image_background, (width, height))
 mask_data = np.array(buffer_mask.as_object(), copy=False)
 mask_data = mask_data.reshape(self.mask_h, self.mask_w)
 mask_data = cv2.resize(mask_data, (width, height))
 mask_data = mask_data.reshape(height, width, 1)
 image_data = np.array(buffer_image.as_object(), dtype=np.uint8, copy=False)
 image_data = image_data.reshape(height, width, channel)
 img_multi = mask_data*image_data/255.
 mask_layer = np.ones((height, width))
 mask_layer = mask_layer.reshape(height, width, 1)
 mask_layer = mask_layer-mask_data
 mask_layer = image_background*mask_layer
 image_add = img_multi+mask_layer
 image_add = image_add*255
 image_add = image_add.astype(np.uint8)
 # frame计数
 self.index += 1
 print("linknet_post " + str(self.index))
 # 将业务处理返回的结果数据转换为Buffer
 add_buffer = modelbox.Buffer(self.get_bind_device(), image_add)
 # 设置输出Buffer的Meta信息,此处直接拷贝输入Buffer的Meta信息
 add_buffer.copy_meta(buffer_image)
 # 将输出Buffer放入输出BufferList中
 out_image.push_back(add_buffer)
 return modelbox.Status.StatusCode.STATUS_SUCCESS
 def close(self):
 # Close the flowunit
 return modelbox.Status()
 def data_pre(self, data_context):
 # Before streaming data starts
 return modelbox.Status()
 def data_post(self, data_context):
 # After streaming data ends
 return modelbox.Status()
 def data_group_pre(self, data_context):
 # Before all streaming data starts
 return modelbox.Status()
 def data_group_post(self, data_context):
 # After all streaming data ends
 return modelbox.Status()复制
修改virtual_background.toml内容:
# Copyright (C) 2020 Huawei Technologies Co., Ltd. All rights reserved.
[driver]
dir = ["${HILENS_APP_ROOT}/etc/flowunit",
"${HILENS_APP_ROOT}/etc/flowunit/cpp",
"${HILENS_APP_ROOT}/model",
"${HILENS_MB_SDK_PATH}/flowunit"]
skip-default = true
[profile]
profile=true
trace=true
dir="${HILENS_DATA_DIR}/mb_profile"
[graph]
format = "graphviz"
graphconf = """digraph virtual_background {
    node [shape=Mrecord]
 queue_size = 1
 batch_size = 1
    # 定义节点,即功能单元及其属性
    input1[type=input, flowunit=input, device=cpu, deviceid=0]
 data_source_parser[type=flowunit, flowunit=data_source_parser, device=cpu, deviceid=0]
 video_demuxer[type=flowunit, flowunit=video_demuxer, device=cpu, deviceid=0]
 video_decoder[type=flowunit, flowunit=video_decoder, device=rknpu, deviceid=0, pix_fmt="rgb"]
 image_resize[type=flowunit, flowunit=resize, device=rknpu, deviceid=0, image_width=256, image_height=256]
 linknet_infer[type=flowunit, flowunit=linknet_infer, device=rknpu, deviceid=0]
 linknet_post[type=flowunit, flowunit=linknet_post, device=cpu, deviceid=0]
 video_out[type=flowunit, flowunit=video_out, device=rknpu, deviceid=0]
    # 定义边,即功能间的数据传递关系
    input1:input -> data_source_parser:in_data
 data_source_parser:out_video_url -> video_demuxer:in_video_url
 video_demuxer:out_video_packet -> video_decoder:in_video_packet
 video_decoder:out_video_frame -> image_resize:in_image
 image_resize:out_image -> linknet_infer:Input
 linknet_infer:Output -> linknet_post:in_mask
 video_decoder:out_video_frame -> linknet_post:in_image
 linknet_post:out_image -> video_out:in_video_frame
}"""
[flow]
desc = "virtual_background run in modelbox-rk-aarch64"复制
其中,profile字段设为true启用性能统计功能。
应用的输入和输出可以在项目工程的bin/mock_task.toml中进行配置:
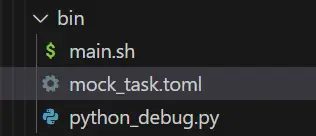
配置应用的输入输出,接下来就可以进入项目进行构建和运行了:
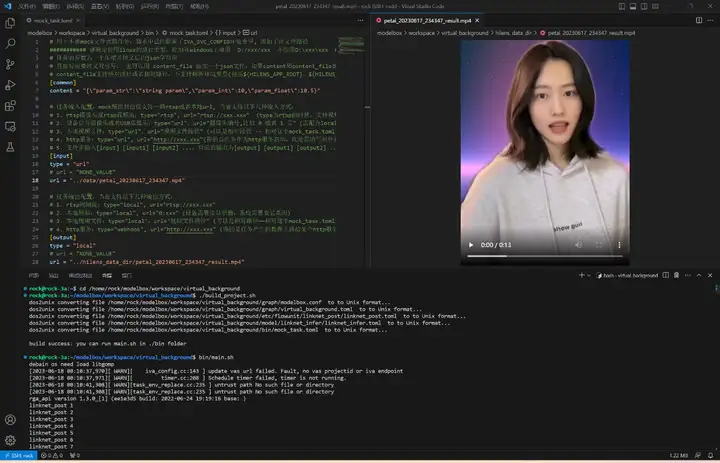
执行bin/main.sh运行应用,生成的视频和性能统计文件在hilens_data_dir文件夹:
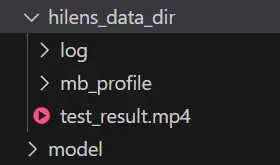
可以右键下载查看性能统计文件:
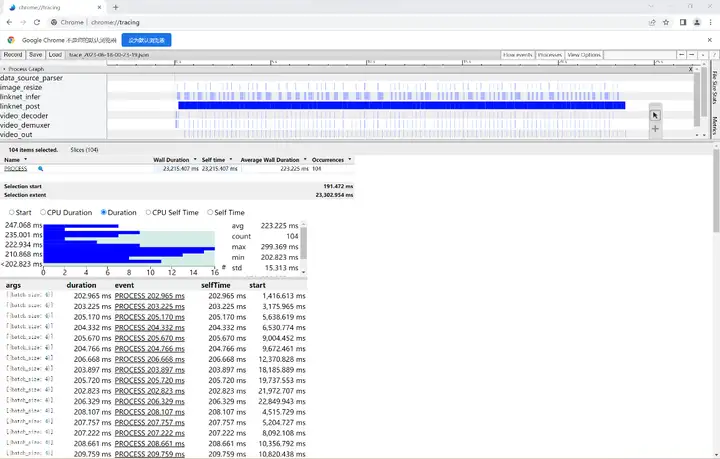
可以看到模型推理确实很快,平均每4次推理耗时223ms,fps约等于18帧每秒。
创建virtual_background_cameral.toml文件,编辑内容如下:
# Copyright (C) 2020 Huawei Technologies Co., Ltd. All rights reserved.
[driver]
dir = ["${HILENS_APP_ROOT}/etc/flowunit",
"${HILENS_APP_ROOT}/etc/flowunit/cpp",
"${HILENS_APP_ROOT}/model",
"${HILENS_MB_SDK_PATH}/flowunit"]
skip-default = true
[profile]
profile=false
trace=false
dir="${HILENS_DATA_DIR}/mb_profile"
[graph]
format = "graphviz"
graphconf = """digraph virtual_background {
    node [shape=Mrecord]
 queue_size = 1
 batch_size = 1
    # 定义节点,即功能单元及其属性
    input1[type=input, flowunit=input, device=cpu, deviceid=0]
 data_source_parser[type=flowunit, flowunit=data_source_parser, device=cpu, deviceid=0]
 local_camera[type=flowunit, flowunit=local_camera, device=rknpu, deviceid=0, pix_fmt="rgb", cam_width=1280, cam_height=720]
 image_resize[type=flowunit, flowunit=resize, device=rknpu, deviceid=0, image_width=256, image_height=256]
 linknet_infer[type=flowunit, flowunit=linknet_infer, device=rknpu, deviceid=0]
 linknet_post[type=flowunit, flowunit=linknet_post, device=cpu, deviceid=0]
 video_out[type=flowunit, flowunit=video_out, device=rknpu, deviceid=0]
    # 定义边,即功能间的数据传递关系
    input1:input -> data_source_parser:in_data
 data_source_parser:out_video_url -> local_camera:in_camera_packet
 local_camera:out_camera_frame -> image_resize:in_image
 image_resize:out_image -> linknet_infer:Input
 linknet_infer:Output -> linknet_post:in_mask
 local_camera:out_camera_frame -> linknet_post:in_image
 linknet_post:out_image -> video_out:in_video_frame
}"""
[flow]
desc = "virtual_background run in modelbox-rk-aarch64"复制
打开工程目录下bin/mock_task.toml文件,修改任务输入和任务输出:
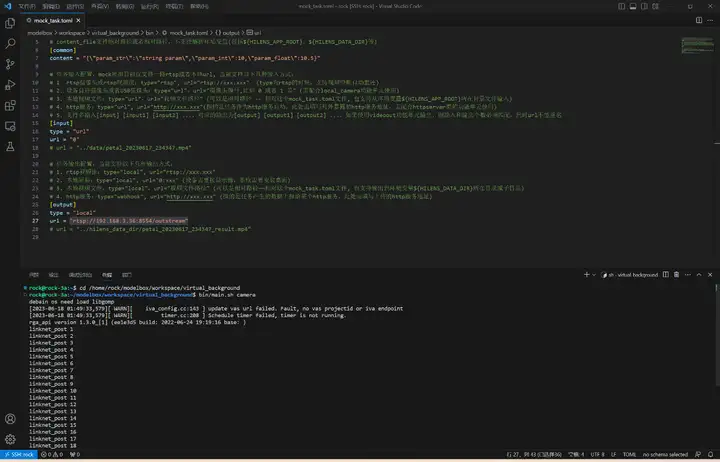
执行bin/main.sh camera运行应用,使用rtsp推流到本地进行查看:
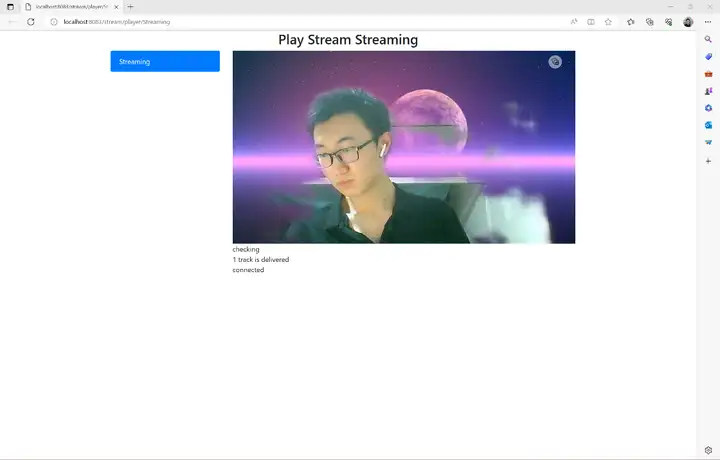
至此我们就完成了摄像头虚拟背景AI应用的开发以及在Windows和RK3568开发板上的部署,本案例所需资源(代码、模型、测试数据等)均可从网盘链接下载,感兴趣的小伙伴赶快下载玩一玩吧!