在终端使用pip安装即可
pip install uiautomator2
可参考:https://www.cnblogs.com/lihongtaoya/p/14970306.html
终端执行如下命令
pip install weditor==0.6.4
确保以上环境都搭建好之后,运行下面代码,安卓设备会自动下载安装ATX应用
import uiautomator2 as u2
# 连接启动
d = u2.connect()
print(d.info)
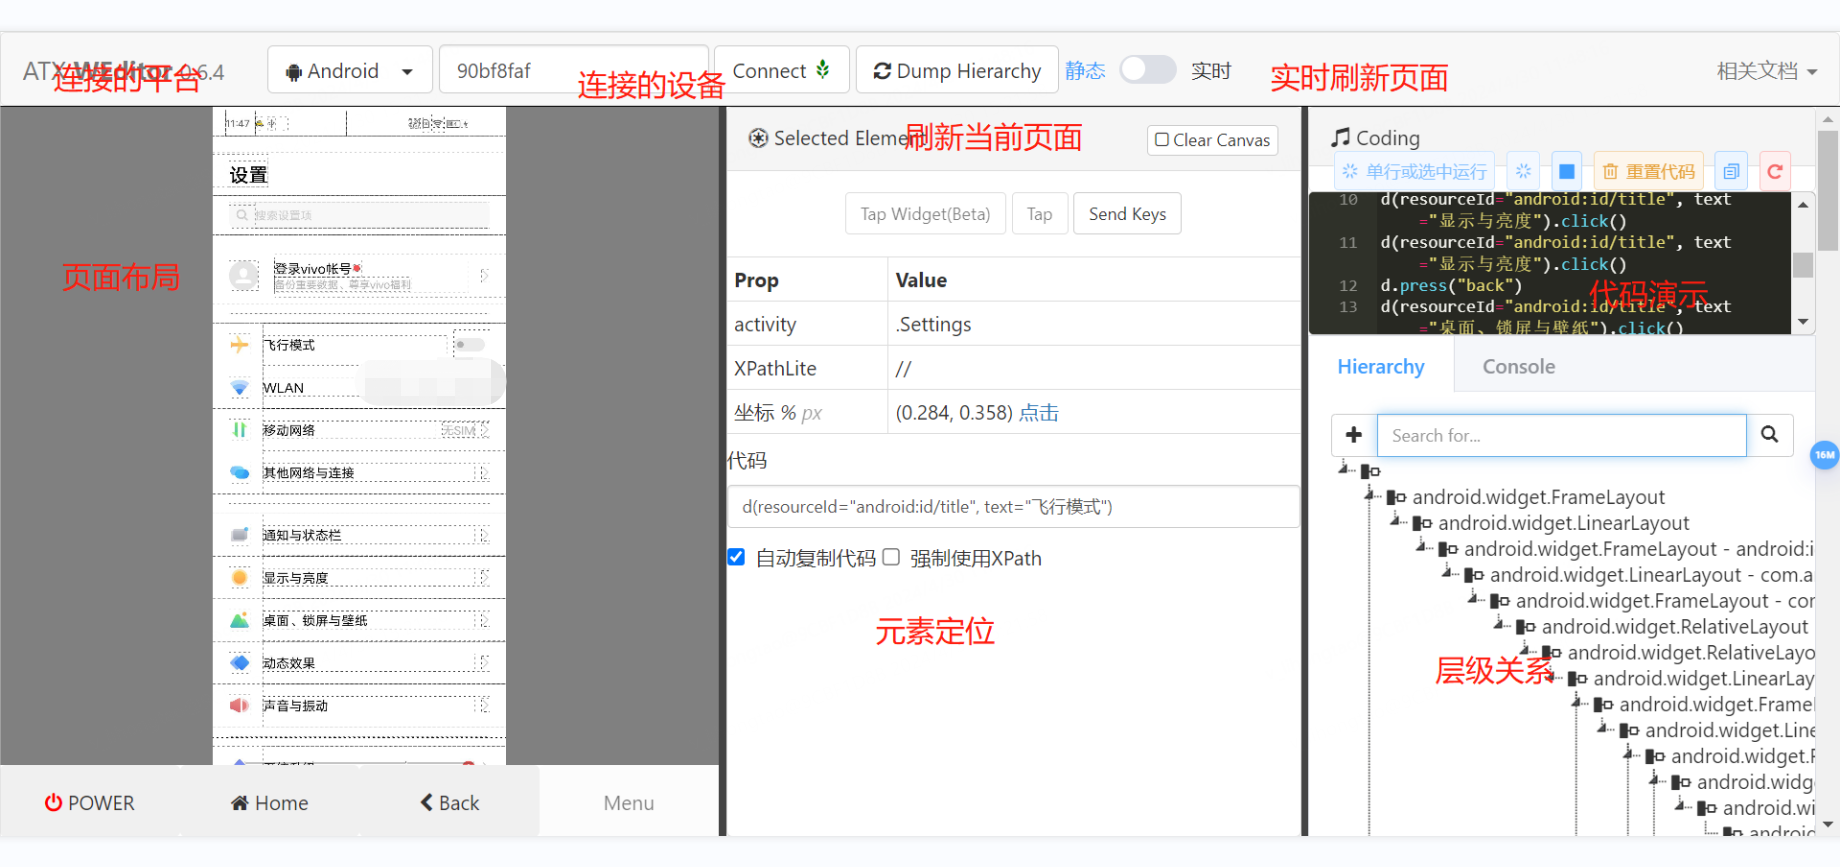
weditor是基于浏览器的一款ui查看器,可以在测试中帮助我们来定位所需要的元素。运行的话可以终端直接输入weditor回车即可

停止ui查看ctrl+c即可停止
1.定位方法
d(resourceId="android:id/title", text="移动网络")  # 两个条件定位
# 或
d(resourceId="android:id/title")  # 一个条件定位
2.可定位的属性
我们在选中一个元素时,Selected Element下就会显示可定位的属性,场景的属性如下。
| className | 类名 |
| index | 下标 |
| text | 文本 |
| textContains | text中包含有指定文本的元素 |
| textMatches | text符合指定正则的元素 |
| textStartsWith | text中指定文本开头的元素 |
| resourceId | 指定内容的元素 |
| package | 包名 |
| description | 描述 |
| checkable | 可检查 |
| clickable | 可点击 |
| enabled | 可激活 |
| focusable | 是否聚焦 |
| focused | 获取聚焦的元素 |
| scrollable | 是否可滚动 |
| longClickable | 可长按 |
| selected | 当前选中 |
3.xpath定位
.xpath("//*[@text='设置' and @content-desc='设置,1条通知']").click()
4.相对定位
先定位到一个元素,在来定位元素周边的元素(即:左右上下)

已”显示与亮度“为坐标,来定位”通知与状态栏“和”桌面锁屏与壁纸“
d(resourceId="android:id/title", text="显示与亮度").up(text="通知与状态栏").click()  # 上
d(resourceId="android:id/title", text="显示与亮度").down(text="桌面、锁屏与壁纸").click()  # 下
# d().left()  # 左
# d().right()  # 右