好家伙,天天拖,终于写完了
代码已开源(Gitee)
(前后端放一起了)
怎么说呢,感觉比较简洁,但是问题不大
实现了分数保存的功能
1.刷新页面后依旧保存数据
2.重新登录后,依旧保存数据
3.生命值为零后,游戏重置
Game.vue
 Game.vue
MyLogin.vue
<template>
  <div class="login-container">
    <div class="login-box">

      <!-- 头像区域 -->
      <div class="text-center avatar-box">
        <img src="../assets/logo.png" class="img-thumbnail avatar" alt="">
      </div>

      <!-- 表单区域 -->
      <div class="form-login p-4">
        <!-- 登录名称 -->
        <div class="form-group form-inline">
          <label for="username">账号:</label>
          <input type="text" class="form-control ml-2" id="username" placeholder="请输入账号" autocomplete="off"
            v-model.trim="loginForm.loginName" />
        </div>
        <!-- 登录密码 -->
        <div class="form-group form-inline">
          <label for="password">密码:</label>
          <input type="password" class="form-control ml-2" id="password" placeholder="请输入密码"
            v-model.trim="loginForm.password" />
        </div>
        <!-- 登录和重置按钮 -->
        <div class="form-group form-inline d-flex justify-content-end">
          <button type="button" class="btn btn-secondary mr-2" @click="writenum">测试</button>
          <button type="button" class="btn btn-secondary mr-2" @click="toregister">去注册</button>
          <button type="button" class="btn btn-primary" @click="login">登录</button>
        </div>
      </div>

    </div>
  </div>
</template>

<script>
import bus from '../js/eventBus'
export default {
  name: 'MyLogin',
  data() {
    return {
      loginForm: {
        id: '',
        password: '',
        life: null,
        score: null,
        loginName: null,
        isFirst:true
      }
    }
  },
  methods: {
    writenum() {
      this.loginForm.loginName = 123456;
      this.loginForm.password = 123456;

    },
    login() {
      //  console.log(this.$store.state.count)
      // console.log('submit!',this.loginForm);
      //表单验证
      if (this.loginForm.loginName == "") {
        this.$message({
          message: '请输入用户名',
          type: 'error'
        });
        return;
      }
      if (this.loginForm.password == "") {
        this.$message({
          message: '请输入密码',
          type: 'error'
        });
        return;
      }
      //发送登陆请求
      if (this.loginForm.loginName != "" && this.loginForm.password != "") {
        this.axios.post('http://localhost:3312/sys-user/login', this.loginForm).then((resp) => {

          console.log("this is login", resp);
          let data = resp.data;
          // console.log(this.$store.state.user)
          console.log(resp.data.content)
          //es6语法,扩展操作符,找到resp.data.content的每一个属性然后赋值给新的对象
          // this.$store.state.user = { ...resp.data.content }
          // console.log(this.$store.state.user)
          //localStorage存
          localStorage.setItem("insuranceCode", JSON.stringify(resp.data.content));
          console.log(this.loginForm.isFirst)
          localStorage.setItem("getisFirst", JSON.stringify(this.loginForm.isFirst));
          console.log(JSON.parse(localStorage.getItem("getisFirst")))
          //localStorage取
          console.log(JSON.parse(localStorage.getItem("insuranceCode")))
          if (data.success) {
            this.loginForm = {};
            this.$message({
              message: '登陆成功!!!',
              type: 'success'
            });
            this.$router.push({ path: '/game' })
          } else {
            this.$message({
              message: '登陆失败,密码错误或用户名未注册',
              type: 'error'
            });
            console.log(data)
          }
        })
      }
    },
    toregister() {
      this.$router.push('/register')
    },
  },
  mounted() {
    // bus.$emit('getLoginName', this.loginForm)
  }
}
</script>

<style lang="less" scoped>
.login-container {
  background-color: #35495e;
  height: 100%;

  .login-box {
    width: 400px;
    height: 250px;
    background-color: #fff;
    border-radius: 3px;
    position: absolute;
    left: 50%;
    top: 50%;
    transform: translate(-50%, -50%);
    box-shadow: 0 0 6px rgba(255, 255, 255, 0.5);

    .form-login {
      position: absolute;
      bottom: 0;
      left: 0;
      width: 100%;
      box-sizing: border-box;
    }
  }
}

.form-control {
  flex: 1;
}

.avatar-box {
  position: absolute;
  width: 100%;
  top: -65px;
  left: 0;

  .avatar {
    width: 120px;
    height: 120px;
    border-radius: 50% !important;
    box-shadow: 0 0 6px #efefef;
  }
}
</style>
这个怎么说呢,其实整个思路非常简单,就是写的时候会有很多小毛病,小bug
思路:
首先我们在登陆的时候,拿着用户输入的用户名和密码,发一次登陆请求,
后端验证密码后,将用户的数据返回(包括id,分数,生命...)
前端拿到数据之后,将数据保存到本地localStorage
localStorage.setItem("insuranceCode", JSON.stringify(resp.data.content));
我们在表单数据中添加一个isFirst属性,来判断是否首次进入游戏界面
isFirst:true
localStorage.setItem("getisFirst", JSON.stringify(this.loginForm.isFirst));
if (JSON.parse(localStorage.getItem("getisFirst")) == true) {
      location.reload();
      console.log("已刷新")
      localStorage.setItem("getisFirst", JSON.stringify("false"));
    }
将页面刷新
随后将isFirst的状态改为"false"
(解释一下,感觉是资源加载的问题,首次进入游戏界面的时候,需要刷新一下,图片资源才能加载出来,
这也是为什么没有用其他的传值方案.其他的传值方案,刷新一下就没了)
//ES6对象的拓展运算符{...Object}
//拓展运算符(...)用于取出参数对象所有可遍历属性然后拷贝到当前对象
this.player = { ...JSON.parse(localStorage.getItem("insuranceCode")) };
    window.life = this.player.life
    window.score = this.player.score
window.life和window.score是我们的游戏参数

随后就是我们的关键计时器了
setInterval(() => {
//当生命值小于1,即为零时,游戏重置
if (window.life < 1) {
// window.life = 3
// window.score = 0;
console.log("已重置")
this.player.life = 3;
this.player.score = 0;
localStorage.setItem("insuranceCode", JSON.stringify(this.player));
this.axios.post('http://localhost:3312/sys-user/update', this.player)
.then((resp) => {
console.log("this is update", resp);
let data = resp.data;
//
if (data.success) {
console.log({
message: '修改成功',
type: 'success'
});
}
})
window.life = 3
window.score = 0
}
this.player.life = window.life
this.player.score = window.score
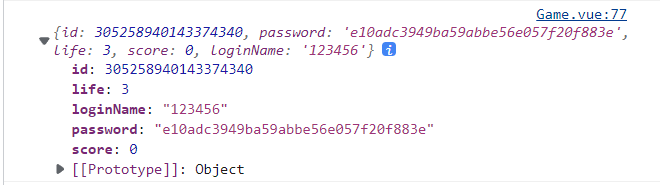
console.log(this.player)
localStorage.setItem("insuranceCode", JSON.stringify(this.player));
console.log(this.player.life, this.player.score,window.life,window.score)
this.axios.post('http://localhost:3312/sys-user/update', this.player)
.then((resp) => {
console.log("this is update", resp);
let data = resp.data;
//
if (data.success) {
console.log({
message: '修改成功',
type: 'success'
});
}
})
}, 1000)
这里是一个每秒(1000毫秒)执行一次的计时器
此处进行判断,
随后发一次请求,保存数据
      this.player.life = window.life
      this.player.score = window.score
更新分数和生命值,然后发请求,将数据保存
解释完毕
