正文
摘要
小年在家陪孩子.
翻阅<企业存储技术>公众号的文章时
找到了 s-tui 进行监控机器主频的文章
感觉挺有用的
想验证一下 虚拟机有否支持Intel的睿频功能.
所以将之前写的python安装编译再优化一般一起拿出来用
复制
目的
怀疑虚拟化为了简单起见 并不会直接使用Intel的睿频技术
物理机能够在TDP限制之外拉高频率.瞬时提高吞吐率
基于此 我想进行物理机和虚拟机的验证.
发现物理机的频率是有一个睿频的数据的.
虚拟机就是默认频率进行运行.
复制
编译安装Python
mkdir /python
cd /python
wget https://www.python.org/ftp/python/3.12.0/Python-3.12.0a4.tar.xz
wget https://ftp.openbsd.org/pub/OpenBSD/LibreSSL/libressl-3.7.0.tar.gz
yum install libffi-devel tcl-devel tk-devel ncurses-devel openssl openssl-devel -y
yum group install "Development Tools" -y
第一步先编译 libressl
./configure --prefix=/usr/local/libressl
make && make install
执行一个简单处理, 将OpenSSL 修改成 LibreSSL
mv /usr/bin/openssl /usr/bin/openssl.bak
mv /usr/include/openssl /usr/include/openssl.bak
ln -s /usr/local/libressl/bin/openssl /usr/bin/openssl
ln -s /usr/local/libressl/include/openssl /usr/include/openssl
echo /usr/local/libressl/lib >> /etc/ld.so.conf.d/libressl-3.0.2.conf
执行一下环境变量
export LDFLAGS="-L/usr/local/libressl/lib"
export CPPFLAGS="-I/usr/local/libressl/include"
export PKG_CONFIG_PATH="/usr/local/libressl/lib/pkgconfig"
复制
编译安装Python2
进入python的目录进行处理.
xz -d Python-3.12.0a4.tar.xz
tar -xf Python-3.12.0a4.tar
cd Python-3.12.0a4/

注意 自定义ssl 需要进行修改
vi Modules/Setup 找到如下内容
注意 在第  214行左右

 _ssl _ssl.c $(OPENSSL_INCLUDES) $(OPENSSL_LDFLAGS) \
     -l:libssl.a -Wl,--exclude-libs,libssl.a \
     -l:libcrypto.a -Wl,--exclude-libs,libcrypto.a

取消注释.

./configure --prefix=/opt/python3 --with-ssl=/usr/local/libressl
time make && make install

复制
注意会出现问题
The following modules are *disabled* in configure script:
_sqlite3

The necessary bits to build these optional modules were not found:
_bz2                  _curses               _curses_panel
_hashlib              _lzma                 _tkinter
readline
To find the necessary bits, look in configure.ac and config.log.

Checked 111 modules (30 built-in, 72 shared, 1 n/a on linux-x86_64, 1 disabled, 7 missing, 0 failed on import)
复制
安装s-tui
cd /opt/python3/bin
./pip3 install  -i http://pypi.douban.com/simple/  s-tui   --trusted-host pypi.douban.com

复制
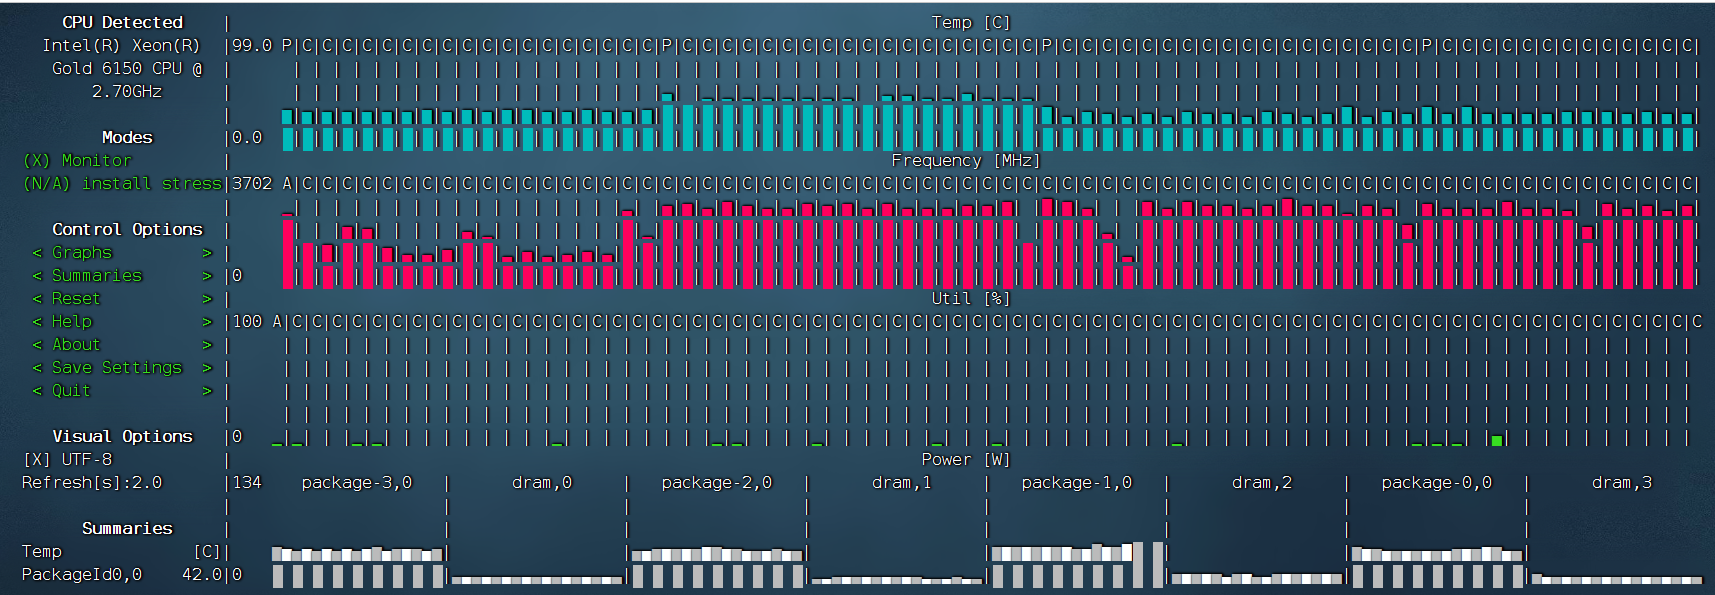
然后可以使用
cd /opt/python3/bin
./s-tui
就可以打开界面了.
会进行一些简单的显示.
./s-tui --help 就可以打开帮助
复制
帮助信息为:
options:
-h,
-d,
Use a custom debug file. Default: _s-tui.log
-dr,
-c,
-t,
-j,
-nm,
-v,
-tt T_THRESH,
High Temperature threshold. Default: 80
-r REFRESH_RATE,
Refresh rate in seconds. Default: 2.0
复制
简单效果

Curses
什么是Curses?
curses库为基于文本的终端提供独立于终端的屏幕绘制和键盘处理设施;这些终端包括VT100s、Linux控制台和各种程序提供的模拟终端。
显示终端支持各种控制代码来执行常见的操作,如移动光标、滚动屏幕和擦除区域。不同的终端使用的代码差别很大,而且常常有自己的小毛病。
在图形显示的世界中,有人可能会问“为什么要这么麻烦”?诚然,字符单元显示终端是一种过时的技术,
但在某些特定领域,能够用它们做一些新奇的事情仍然很有价值。其中一个利基市场是不运行X服务器的占用空间小或嵌入式unix。
另一个是OS安装程序和内核配置器等工具,它们可能必须在任何图形支持可用之前运行。
curses库提供了相当基本的功能,为程序员提供了一个包含多个非重叠文本窗口的显示抽象。窗口的内容可以通过各种方式进行更改——添加文本、
擦除文本、更改外观——curses库将计算出需要将哪些控制代码发送到终端才能生成正确的输出。curses没有提供许多用户界面概念,比如按钮、
复选框或对话框;如果需要这些特性,可以考虑使用用户界面库,比如Urwid。
curses库最初是为BSD Unix编写的;AT&T后来的System V版本Unix增加了许多增强功能和新功能。
不再维护BSD curses,取而代之的是ncurses,它是AT&T接口的一个开源实现。如果您使用的是开源Unix,
比如Linux或FreeBSD,那么您的系统几乎肯定使用了ncurses。由于目前大多数商业Unix版本都基于System V代码,
所以这里描述的所有函数可能都是可用的。不过,一些专有的Unixes携带的旧版本的咒语可能并不支持所有的功能。
复制
