体验IntelliJ IDEA的远程开发(Remote Development)
体验,intellij,idea,远程,开发,remote,development
·
浏览次数 : 575
小编点评
## Getting Started with IDEA Remote Development
This document provides step-by-step instructions for setting up and using IDEA's remote development environment.
**Environment Setup**
1. **Clone your Git repository**:
- Visit the GitHub repository: `git clone https://github.com/zq2599/blog_demos.git`
- This will download the project files to a directory named `blog_demos` on your local machine.
2. **Configure your remote server**:
- Open a terminal on your Ubuntu server running JetBrains IDE.
- Run the following command: `remote add origin git@your_remote_server_ip:path/to/repository`
- Replace `your_remote_server_ip` with the actual IP address of your remote server and `path/to/repository` with the actual path to your Git repository on the server.
3. **Start an IDEA remote server**:
- Open the "Settings" (macOS) or "Preferences" (Windows/Linux) and search for "Remote Development".
- Click on "New" and select "Remote Server...".
- Enter the server's IP address, port number, username, and password.
- Click "Add".
- The server will be started and the connection details will be displayed.
4. **Connect to your remote server**:
- Open a terminal on your local machine.
- Run the following command: `idea --remote-connect :`
- Replace `` with the IP address of your remote server and `` with the port number specified in the server's configuration.
5. **Set the project directory**:
- Open the "File" menu and select "Project Structure...".
- Select the directory containing your Java project.
**Project Structure and Development**
1. **Navigate the project structure**:
- You should now see the project directory structure in the IDE's project view.
- You can use the project structure panel on the left side to navigate through the different folders and files.
2. **Compile and run the application**:
- To compile and run the application, right-click on the project root in the project structure and select "Run".
- This will launch the application and execute the code in the server's environment.
3. **Debug the application**:
- To debug the application, follow the same steps as you would for a local development environment.
- You can set breakpoints and inspect variables and stack traces.
**Remote Development Features**
- **Remotely open directories**:
- To open a directory on the server, right-click on it in the project structure and select "Open in".
- This will open the directory in a remote editor, such as Visual Studio Code.
- You can also use the terminal in the server to navigate and edit files.
- **Remotely manage projects**:
- You can create, edit, and delete projects on the server directly from the IDE.
- You can also manage project dependencies and build settings.
**Additional Tips**
- You can save frequently used configurations in the IDE's settings.
- You can install plugins to extend IDEA's functionality for remote development.
- Remember to save your Git repository on the server for version control.
- Close and keep the remote server connection open for uninterrupted development.
**Conclusion**
Following these steps will allow you to set up a remote development environment using IDEA and enjoy its benefits. By connecting to your remote server, you can develop and debug Java applications with ease and efficiency.
正文
欢迎访问我的GitHub
这里分类和汇总了欣宸的全部原创(含配套源码):https://github.com/zq2599/blog_demos
本篇概览
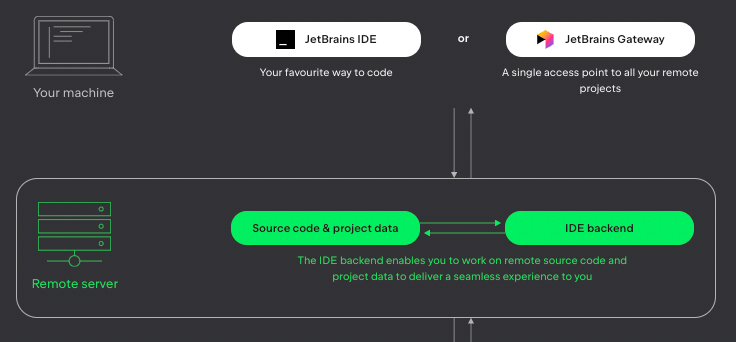
- IDEA的远程开发功能,可以将本地的编译、构建、调试、运行等工作都放在远程服务器上执行,而本地仅运行客户端软件进行常规的开发操作即可,官方给出的逻辑图如下,可见通过本地的IDE和服务器上的IDE backend将本地电脑和服务器打通,实现了远程开发的效果
- 环境信息一览
- 准备服务器
- IDEA远程连接
- 重新设置工程的根目录
- 端口转发
- 其他要注意的地方
环境信息一览
- IDEA:2021.3.2 (Ultimate Edition)
- 本地电脑操作系统:macOS Montery(12.3)
- 服务器:Ubuntu 20.04 LTS(4核8G)
准备服务器
-
一台Linux服务器是远程开发必须的,自己内网的、租用云服务厂商的都可以
-
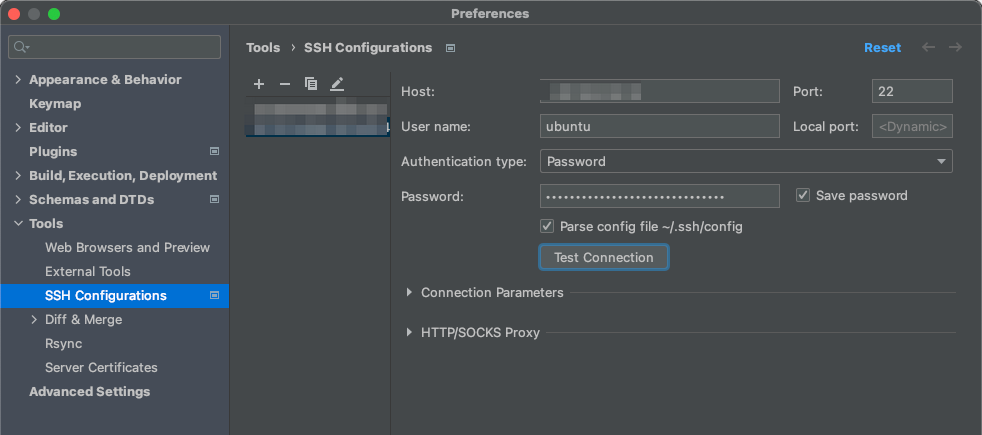
IDEA会自动在服务器上安装所需的服务,咱们无需提前准备什么,唯一要求是可以通过SSH登录此服务器
-
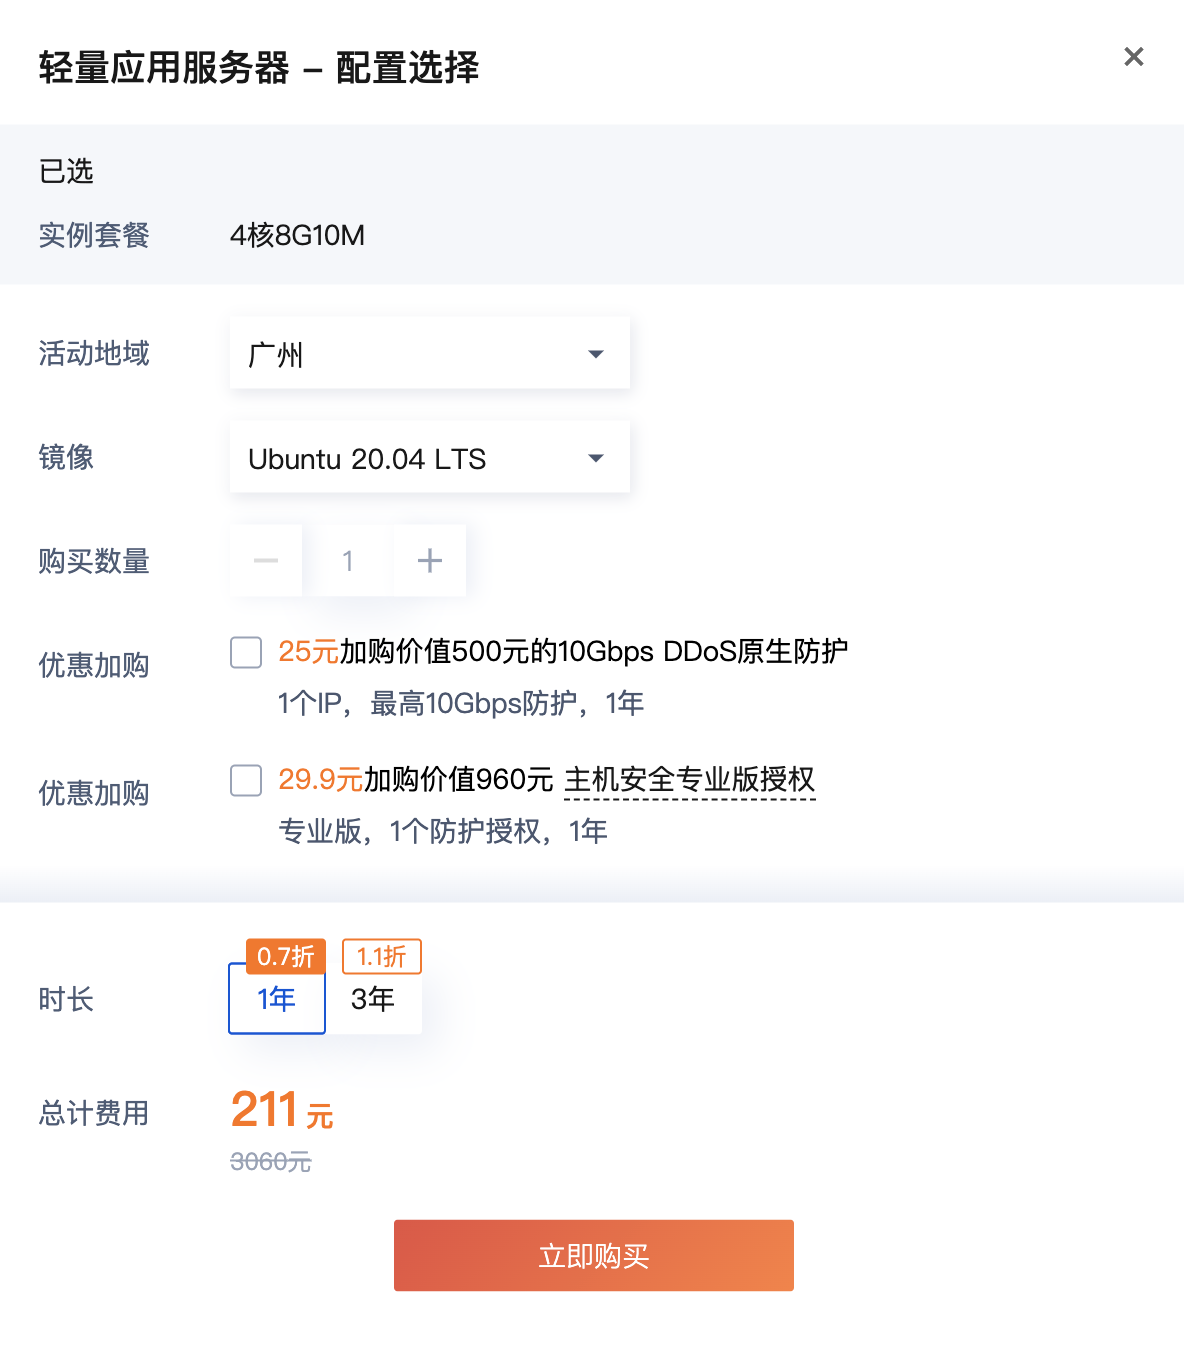
欣宸的服务器是腾讯云轻应用服务器,在官网租用的,如下图,4核8G,一年两百多,感觉挺划算
-
接下来要在服务器上把开发用的代码准备好,我这里是将自己github仓库下载到服务器上,代码存放在这里:/home/ubuntu/jetbrains-workspace
ubuntu@VM-12-12-ubuntu:~/jetbrains-workspace$ git clone https://github.com/zq2599/blog_demos.git
Cloning into 'blog_demos'...
remote: Enumerating objects: 14559, done.
remote: Counting objects: 100% (1097/1097), done.
remote: Compressing objects: 100% (350/350), done.
remote: Total 14559 (delta 846), reused 818 (delta 703), pack-reused 13462
Receiving objects: 100% (14559/14559), 110.29 MiB | 3.05 MiB/s, done.
Resolving deltas: 100% (4714/4714), done.
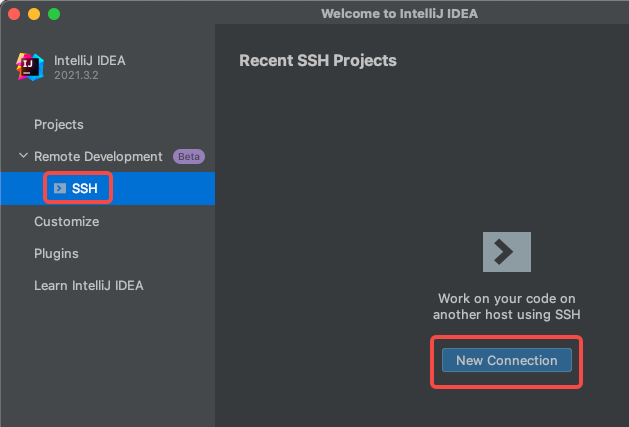
IDEA创建远程连接
-
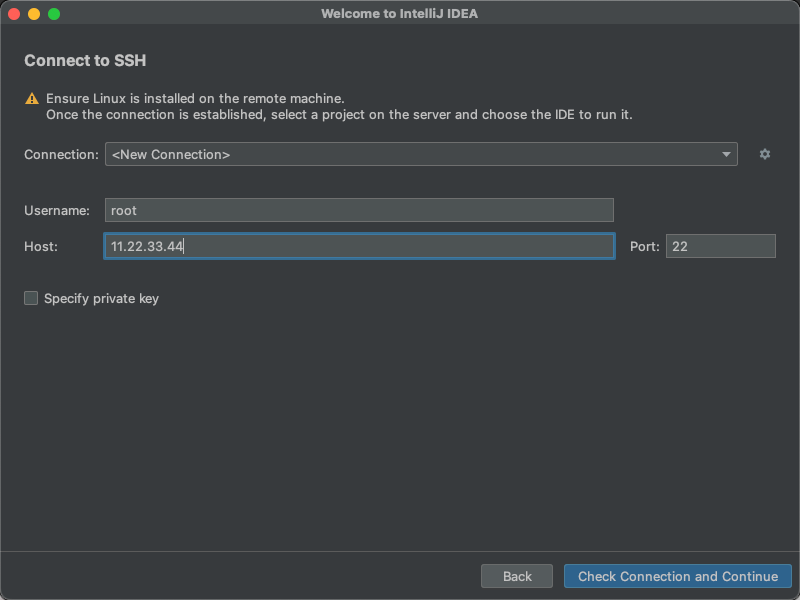
输入IP地址,账号密码
-
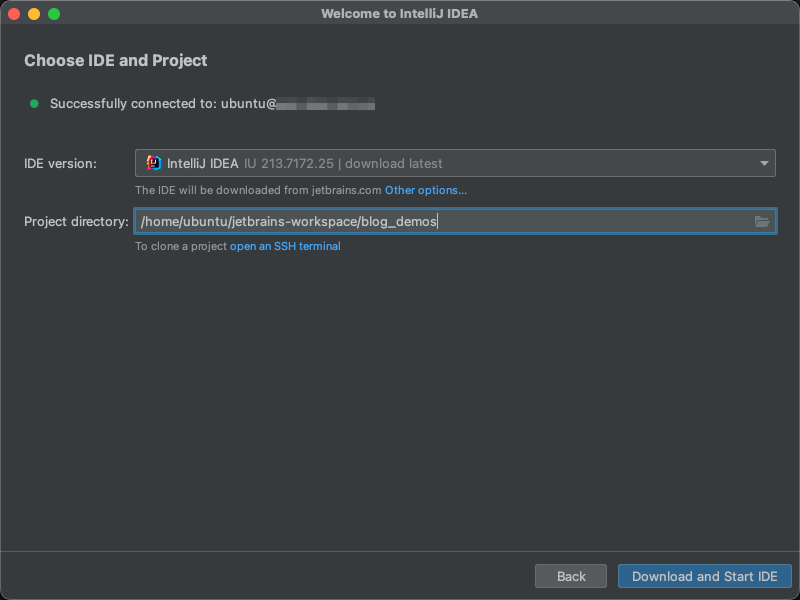
按要求输入密码,远程连接成功后,指定工作目录(Project directory),我指定的是代码仓库所在目录,然后点击右下角的Download and Start IDE
-
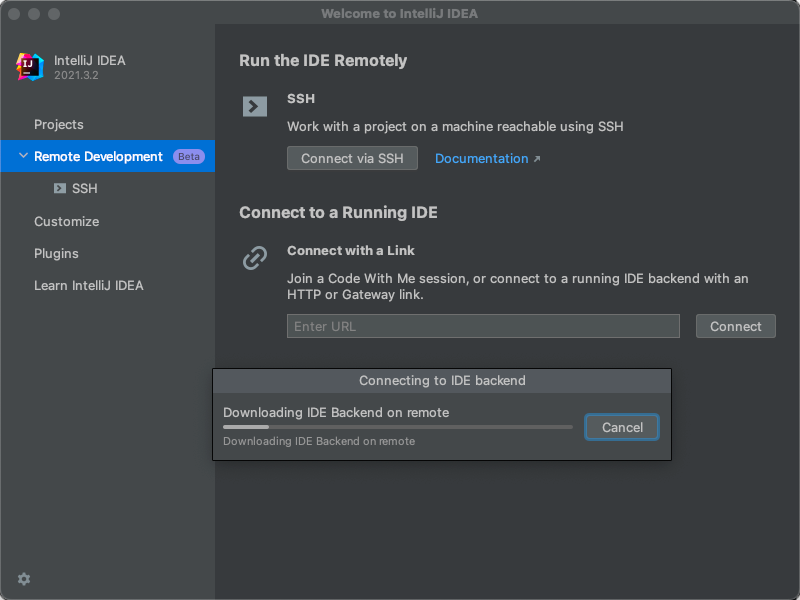
远程服务器开始下载后端应用,这是用于支持远程开发的服务
-
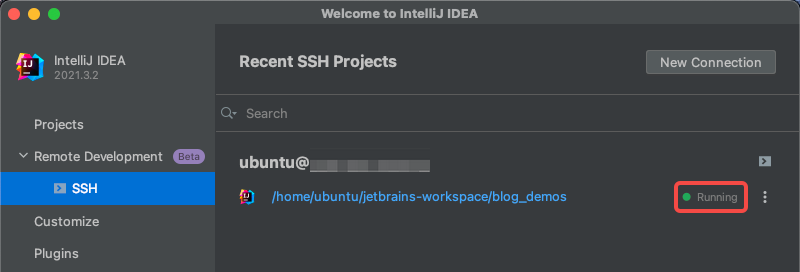
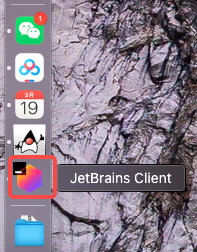
等待下载完成后,就会多出一个名为JetBrains Client的应用,并且已经打开,如下图红框,这就是将来做远程开发的本地工具了
-
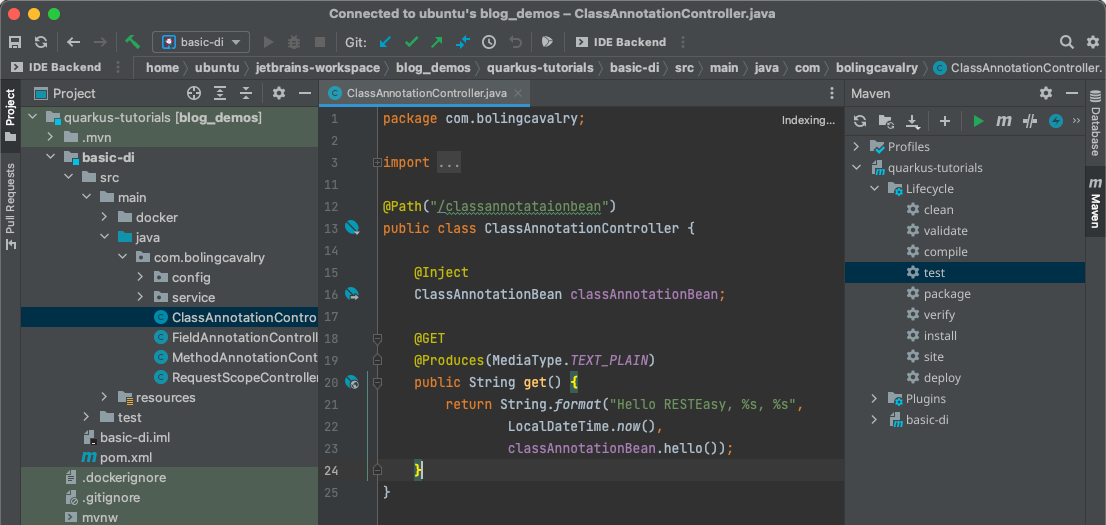
JetBrains Client界面如下,看起来像是IDEA,可以看到刚才在服务器下载的整个仓库的内容,和在本地打开没什么区别,Terminal打开的也是服务器目录,修改代码时改动的也是服务器上的代码
-
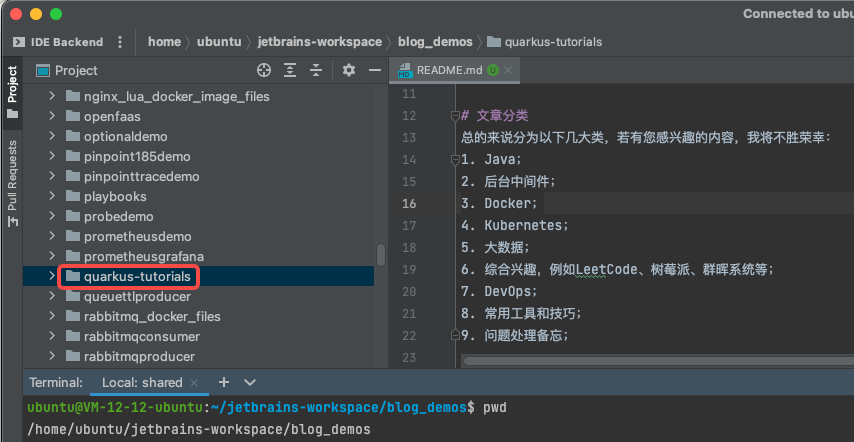
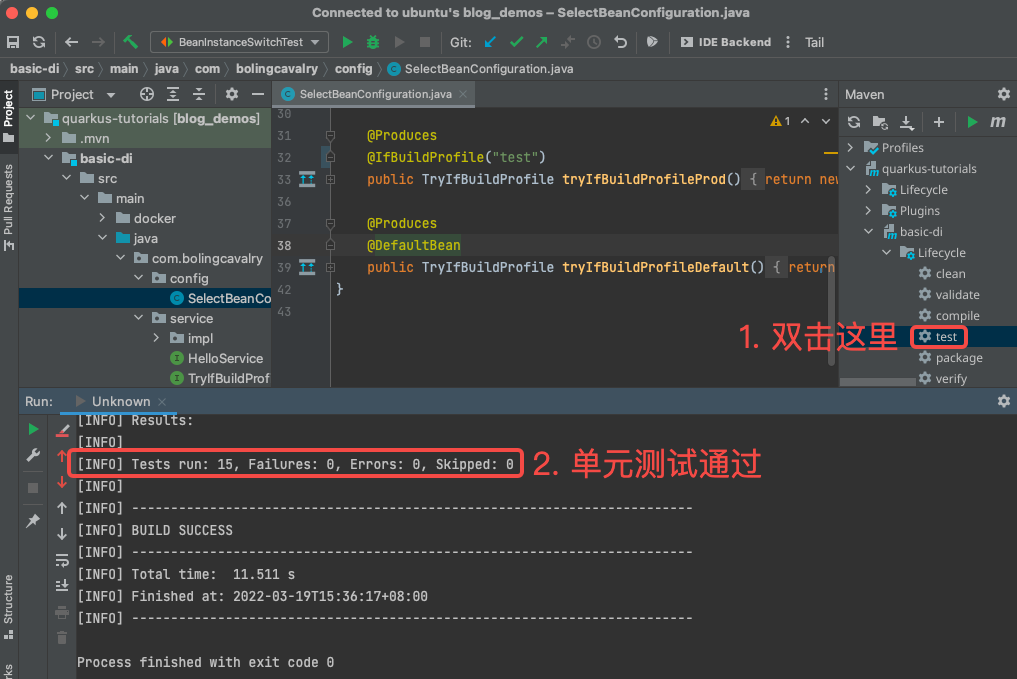
还剩一个问题:如上图所示,此仓库中并不只有一个java项目,而是有几十个文件夹,每个文件夹下都是个独立的工程(有的是gradle,有的是maven),如果我现在只想修改其中的一个(例如上图红框中的quarkus-tutorials),并编译运行它,应该怎么操作?接下来就解决此问题(这是IDEA的操作,并非远程连接的问题)
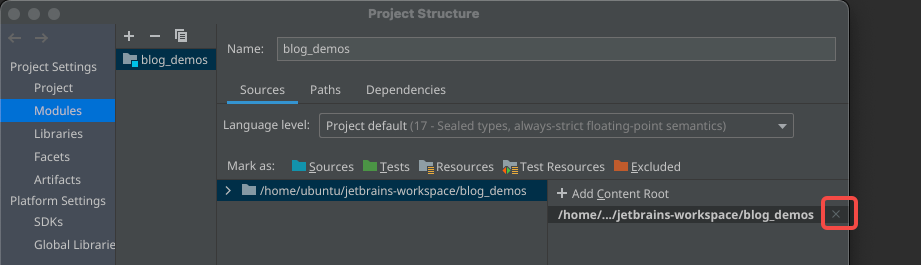
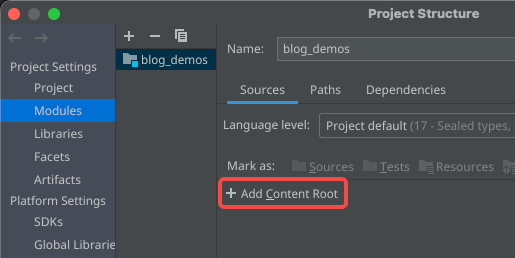
重新设置工程的根目录
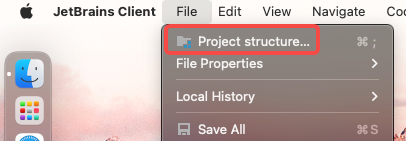
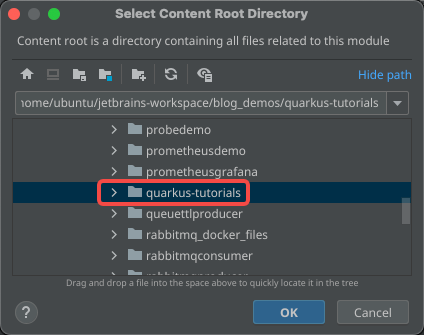
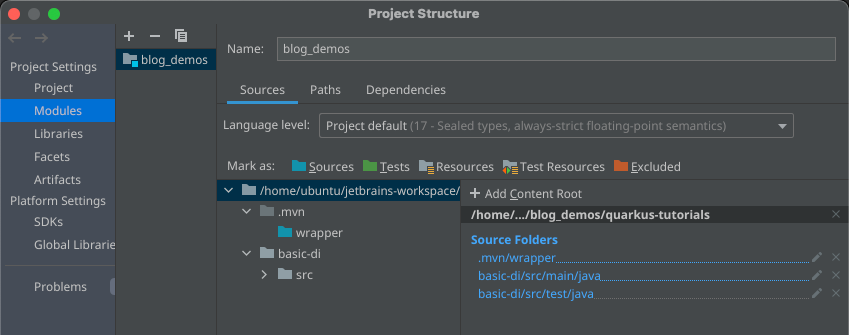
- 您可能会觉着这一段的操作是多此一举:只要在远程连接的时候设置工作目录是quarkus-tutorials就行了,没必要这么麻烦,您说的没错,在远程连接的时候确实可以直接指定目录,但是如果此刻使用的是Jetbrains的space,那里无法直接指定目录,只能直接打开
作为maven工程运行
- 关于服务器的JDK,如果装了,请按照下图位置去选择,如果没有安装,按照下图进行远程下载即可
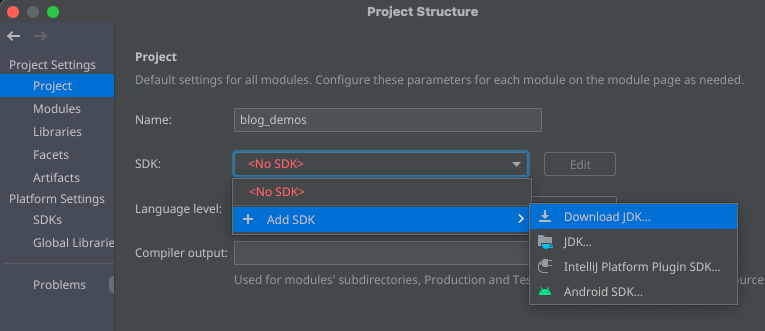
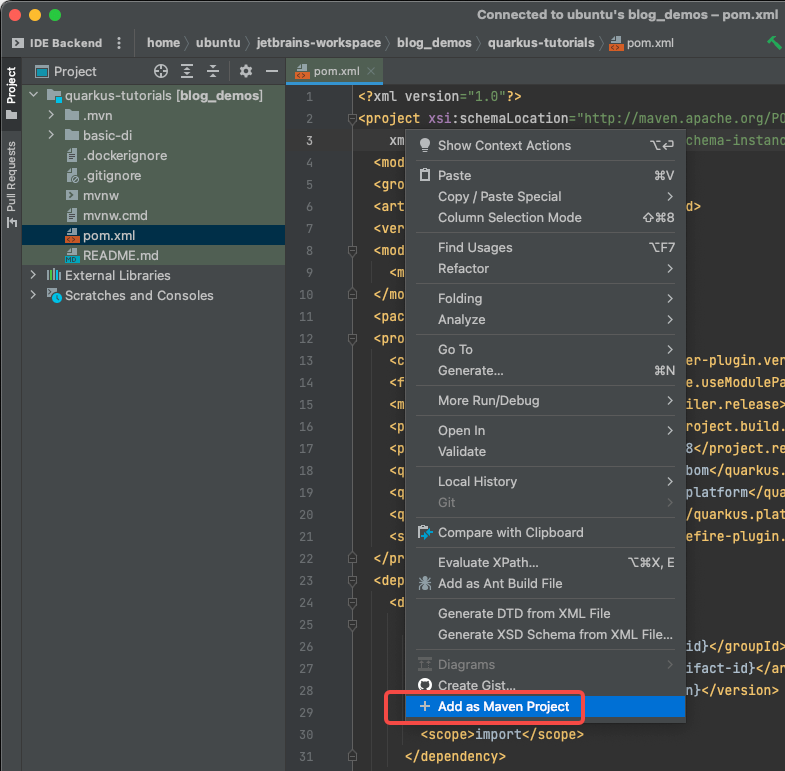
- 此刻,IDE并未识别到这是个maven工程,需要打开pom.xml,然后在右键菜单中选择Add as Maven Project,如下图红框
端口转发
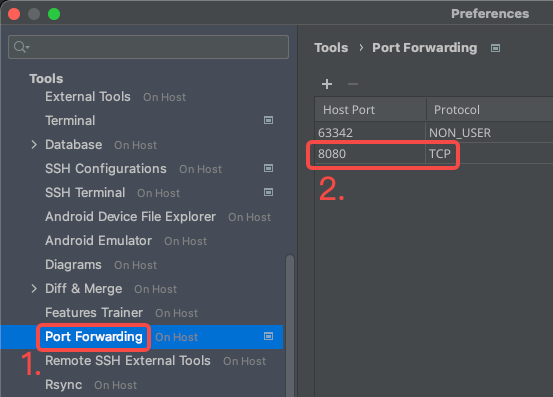
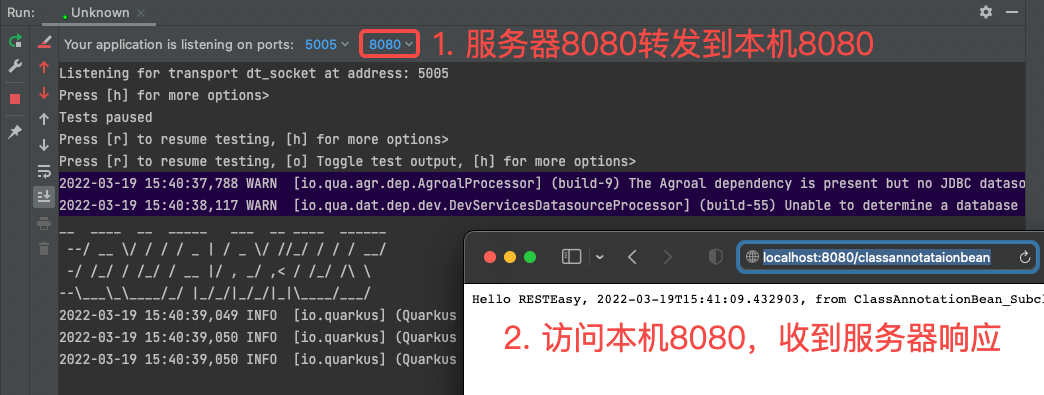
- 开发web应用时,启动应用后,访问远程IP地址和端口可能比较麻烦(有的服务器涉及到安全问题不轻易开端口),此时JetBrains Client提供的端口转发功能非常实用
- 端口转发配置方式如下图,这样我访问本机的8080端口时,请求就会转到服务器的8080端口
- 启动应用试试,我的应用是个普通web应用,启动后监听8080端口,然而我并没有给服务器开通8080端口到外网,如下图,从本地可以访问成功
其他要注意的地方
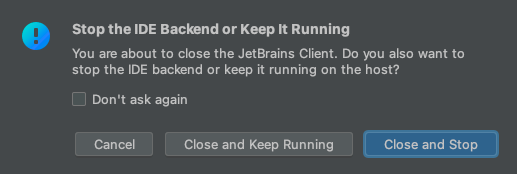
- 退出的时候,会提示是否关闭远程服务,请自行选择,我选择的是Close and Keep Running
欢迎关注博客园:程序员欣宸
学习路上,你不孤单,欣宸原创一路相伴...
与体验IntelliJ IDEA的远程开发(Remote Development)相似的内容: